Welcome to your training site!
These step-by-step instructions will help you manage your learning account; purchase training courses for yourself; and transfer courses to employees, students or clients.
Initial Account Registration
If you are a member of the National Drug and Alcohol Screening Association, with an account in the NDASA member portal, click on the “Login or Register” button on ndasauniversity.com. When you scroll down, you will click on the blue “Memberclicks SSO” button and sign in using your member username and password. From here, proceed to purchase your course.
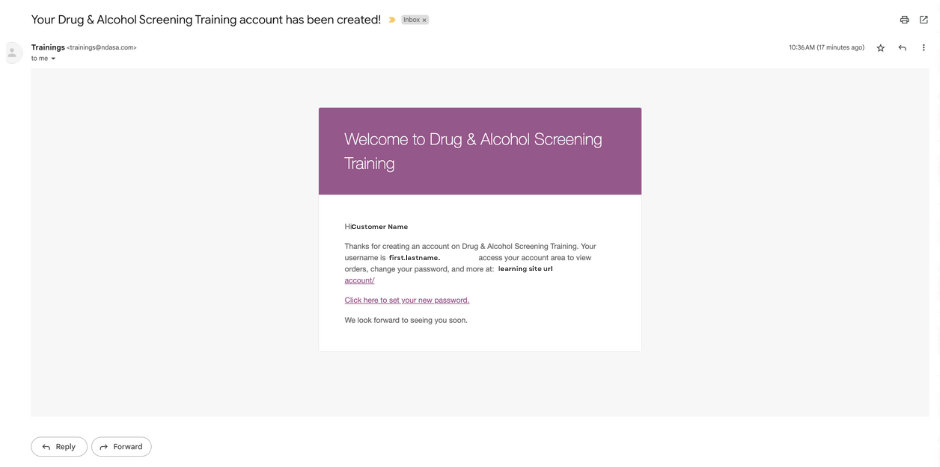
If you are not an NDASA member (with a member username and password for the NDASA member portal), initial registration in the learning system automatically occurs when you purchase your first training. After your first order is completed, your email and account details are saved in the system. You will then receive an email prompting you to set up a password.
Please note that learning accounts in this system are tied to individual email addresses, and every student taking a course must be registered with their own, individual email address. Detailed instructions are provided below for setting up your students after you purchase training on their behalf.
NOTE:
The NDASA University system tends to default to billing information when creating an account username and allocating a first and last name for the user on the account.
Therefore if using an employer’s/supervisor’s/company credit card to purchase a course for someone else, the account will in most cases save the employer’s name and delegate a username based on the employer’s name, no matter if the student’s email is used to purchase the course. When this occurs, the wrong name and username are associated with the account email and will appear on the certificate of completion.
To avoid this issue when purchasing with an employer’s/supervisor’s/company credit card, it is best practice to also use the employer’s email address (not the student’s) to purchase the course. After the purchase is complete, the employer/company then can transfer the course to the student who will have their own account associated with their email. (See instructions below for transferring courses).
Troubleshooting: If you run into this issue after a course has been purchased, you can change the first and last name listed on the account. Log into the learning site, and under MY ACCOUNT (in the account dashboard) follow the link to “edit your password and account details.” Update your first and last names as well as the display name. You cannot change the username, but the correct name will appear in the course and on the certificate of completion.
Purchase a Course
1. Select your course for purchase.

2. On the purchase page, name your class. This is to help you keep track, whether you intend to take the course yourself or transfer it to another student. Note: The class name will not impact who the course is eventually assigned to. You can follow the process to transfer the course to another student once the purchase process is complete.
3. If you intend to take the course yourself, check the “Take up a seat” box. If you intend to assign the course to someone else, do not check the “Take up a seat” box.
4. The “Number of seats” box indicates the number of people you are purchasing the course for. (1 seat for one student, 10 seats for 10 students, etc.).

5. Add your training to the cart, and complete the purchase process. Note: If your payment/order fails, check your payment details and billing address, and try again. If your order is not processed, please contact the Support Desk.
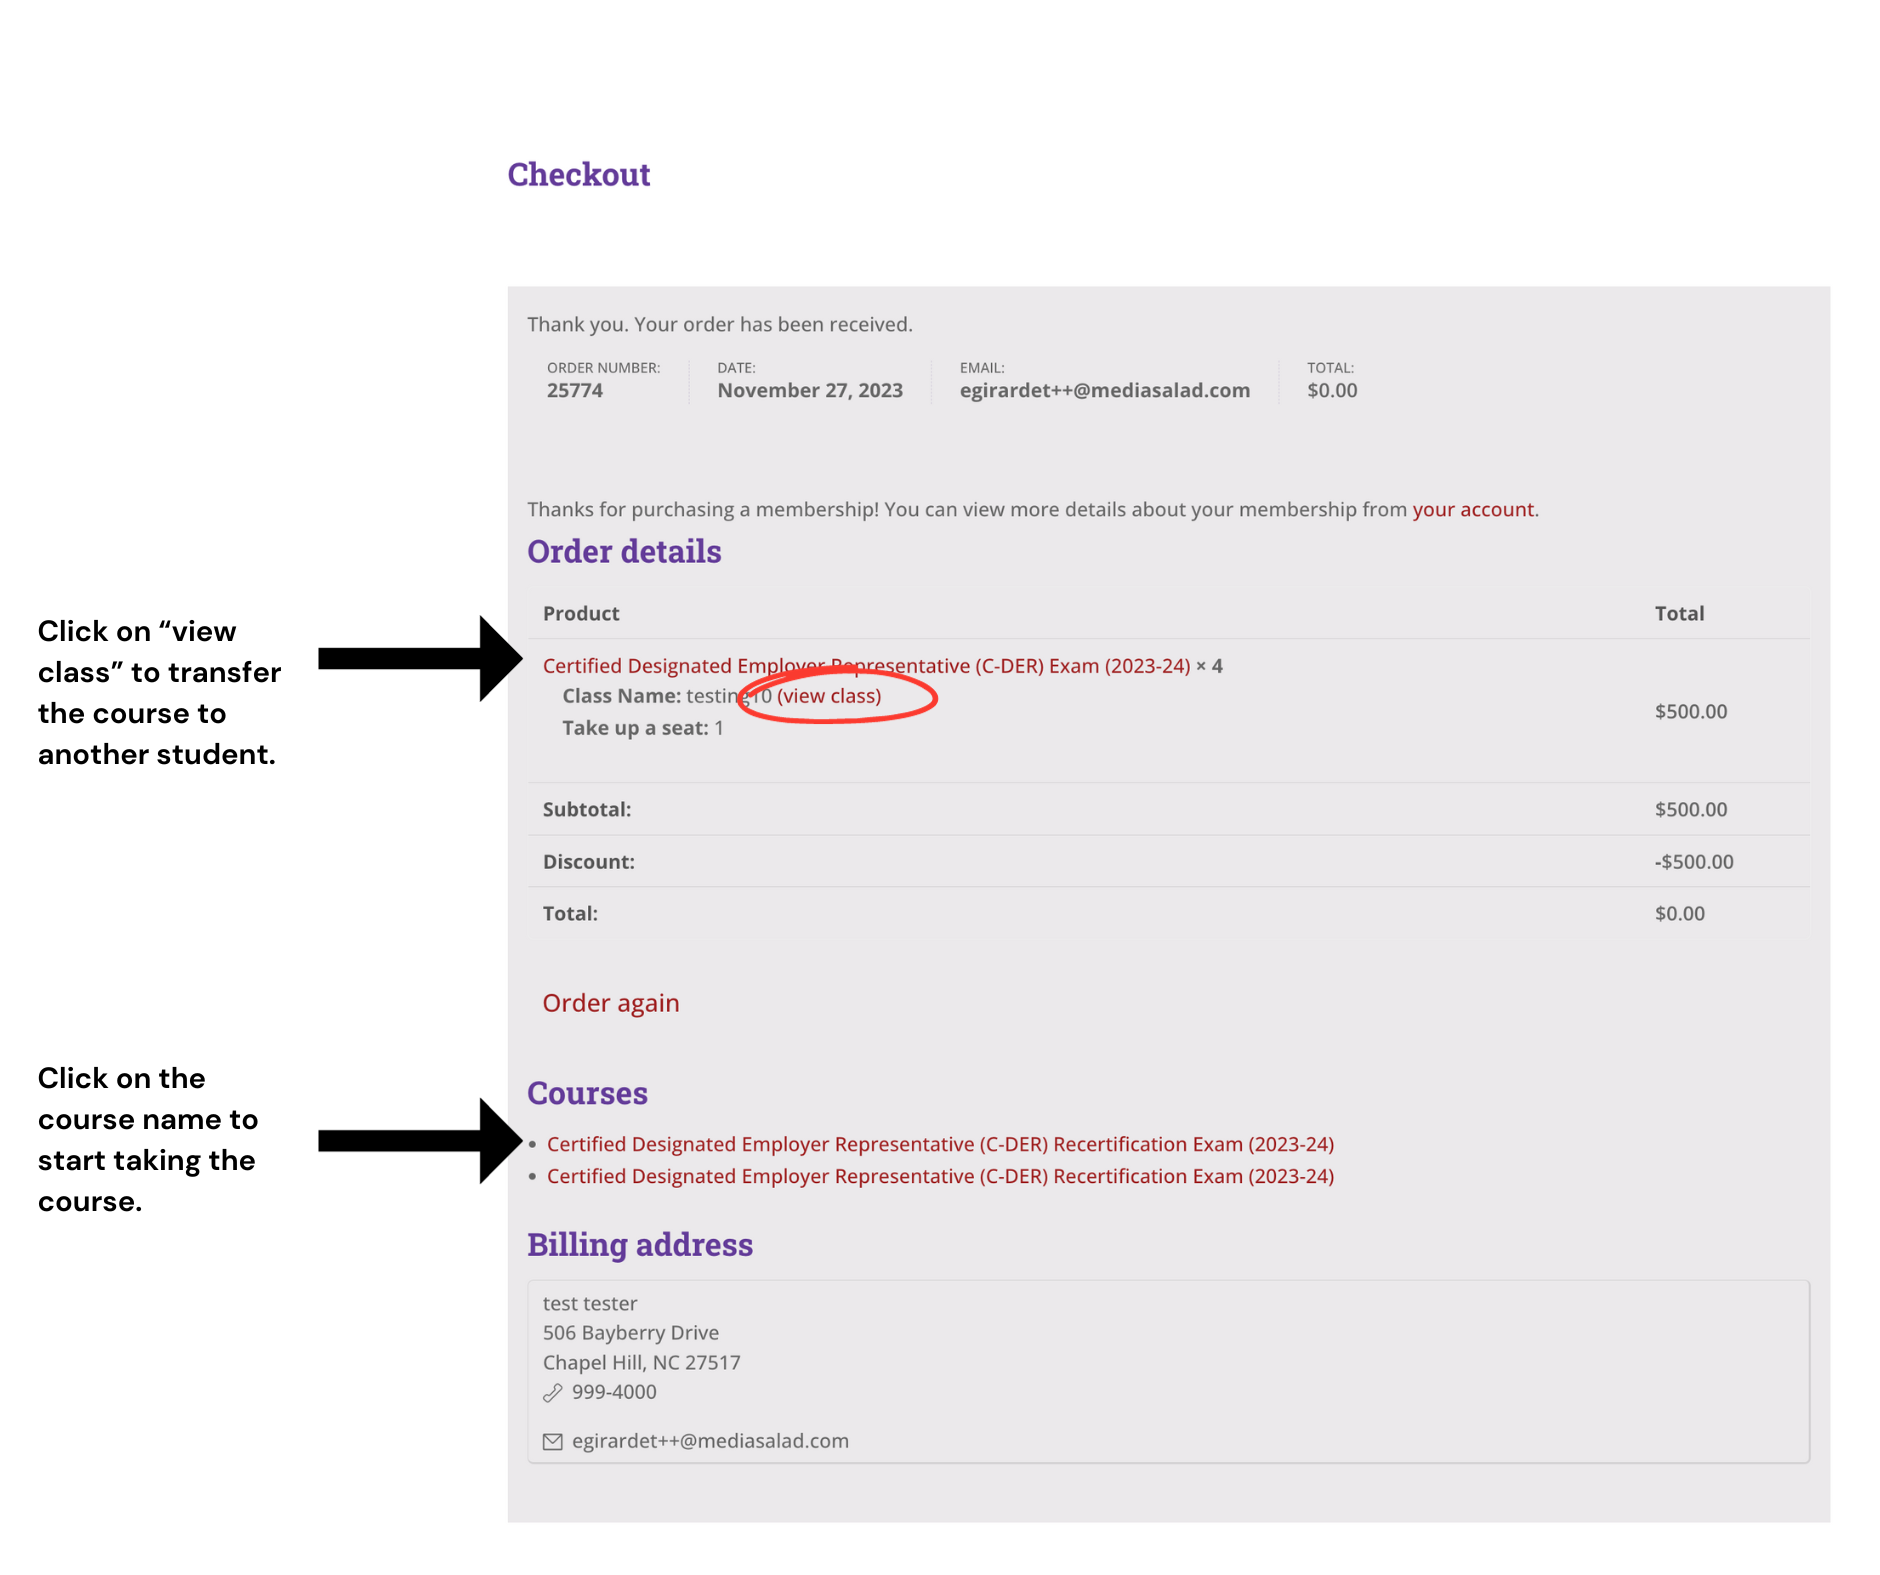
6. Once the purchase is completed, you will see the confirmation page. If you intend to take the course yourself, click on the name of the course under the Courses section to begin your training. You also can click on “view class” and then click on the MY COURSES button on the learning site to access the course.
Transfer a Course to Another Student
Frequently, clients purchase online training on behalf of their employees or customers. It is important to remember that the purchase process must be completed before you can transfer the course to another student by adding their email address in the system.
1. If you intend to transfer the course to an employee, client or someone else, you can click on “view class” on the confirmation page for course purchase. If you plan to transfer a course at another time or transfer it from one student to another follow these steps:
- Log into NDASA University or another learning site.
- In your account dashboard, you will see a control bar on the left-hand side of the page. Click on “Classes.”

- Then, click on “View” next to the class you want to add a student to.

2. You then will land on your class dashboard, where you can see how many seats you have available in a class. Here you also have the option to add student(s) to the class by clicking “Add Member” or you can “Remove” a member and transfer the course to another student.

2. Add a student to your class by entering their email address. The student will receive an automated email inviting them to register for the course and take it. Note: Sometimes the automated emails land in spam or are blocked by an organization’s firewall. If your student does not see their course invitation, you can cut and paste the Registration Link and email it directly to them.

The student will complete the registration process and be given access to their course. When they are logged into the learning site, they also can access their course by clicking the MY COURSES button.
NOTE:
Your student must respond to the automated invitation to register for the course (or the registration link that you send them separately) to be enrolled in the class. Even if they have previously taken a course through the learning system and have an account, they will NOT be enrolled or see the course in their account without registering for that specific course.
Manage Your Account
If you need to log out of the learning site after your initial purchase and want to log in again to continue taking your course or to purchase another training, you can access the system in three ways:
- Enter your email and password to log in.
- Click on “Lost your password?” and follow the prompts.
- If you still have difficulty getting into the system, we can help. Please contact the Support Desk.
If you have not previously purchased a course and aren’t in the system yet, you have the option to register by entering your email address under “Register” and completing the password setup process. But please remember that when you purchase your first training, you are automatically registered.
After logging in, you will land on the Account Dashboard. Here you can:
- Follow links to update account information or set a new password. (Note: If the wrong name appears on your account or on your certificate of completion, this is where you can change it by following the link to “edit your password and account details.”)
- Navigate in the left-hand menu to view “Classes” and assign them, review past “Orders,” manage “Payment methods,” and more.
- Access your course(s) and Certificate(s) of Completion by clicking on the MY COURSES button.
To return to this main dashboard at any time, click on the MY ACCOUNT button.
If you run into any problems, we are here to assist! Click on Help in the navigation, or go directly to the Support Desk.
Troubleshooting
Who to contact:
It you run into any problems we are here to assist!
- You can click on Help in the navigation, or go directly to the Support Desk or
- For issues with logging in, your password or any technical glitches, contact Evelyne Girardet
- For questions concerning training, certification or compliance, contact Samantha Brown.
Common Concerns
- My certificate of completion has the wrong name on it, what do I do? The system sometimes defaults to billing information and therefore uses the name of the individual who paid for your course. To correct this, go to your account page (MY ACCOUNT) and follow the link to “edit your password and account details.” Once you have updated your name under your account, any certificates of completion in the system will also automatically update.
- I am an NDASA member, how should I log into NDASA University? If you have never used the NDASA University system before and do not have an account in NDASA University: You can log in using your NDASA member username and password by clicking the blue “Memberclicks SSO” button. However, if you already established an NDASA University account separate from your NDASA member account, you must log in using your NDASA University username and password. Contact Evelyne Girardet if you want the same login credentials for your NDASA member and NDASA University accounts.